摘要:通过调用ModelArts上的动漫头像制作应用,将头像图片转化为动漫风格的头像图片。
一、 案例介绍
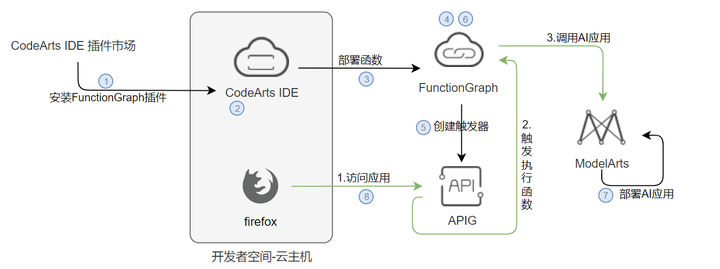
本实验基于FunctionGraph和ModelArts的智能头像动漫化处理应用。通过部署在FunctionGraph上的函数,用户可以上传自己的头像图片,通过调用ModelArts上的动漫头像制作应用,将头像图片转化为动漫风格的头像图片。
二、 领取云主机
三、 实验流程
四、 安装FunctionGraph插件
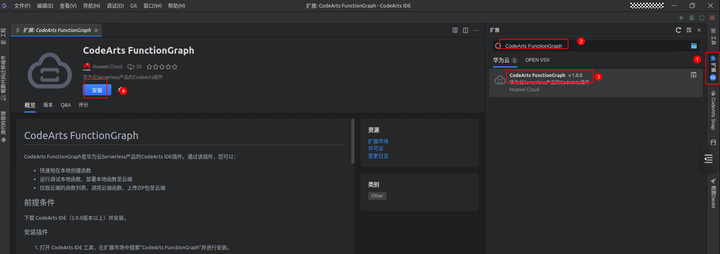
方式一:在线安装
进入 云主机 ,打开CodeArts IDE,点击左侧“扩展”搜索“CodeArts FunctionGraph”点击安装该插件。
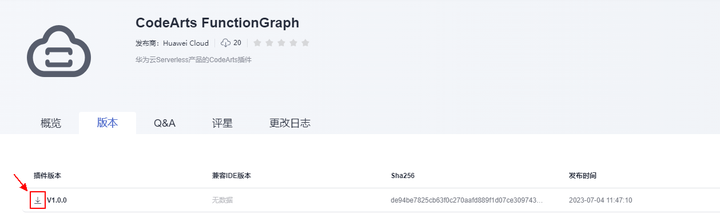
方式二:本地安装
在云主机桌面,打开CodeArts IDE开发环境,单击右侧“扩展”按钮,点击从本地安装,选择下载好的插件安装。
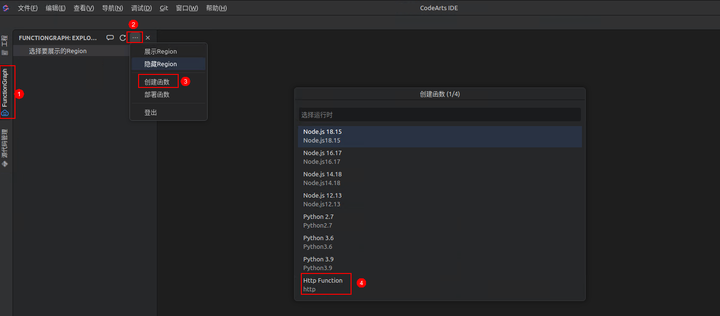
五、创建函数
FunctionGraph插件安装后,如提示登录请登录后使用。打开插件,在插件窗口点击“…”选择“创建函数”,选择Http Function函数。
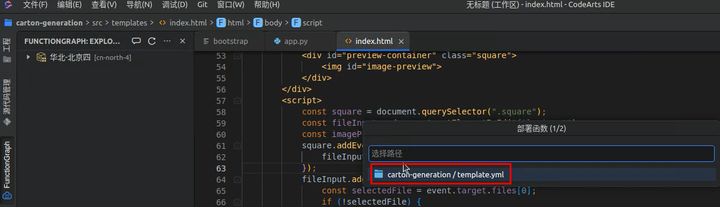
选择工程路径,选择后插件会在该路径下创建carton-generation工程。
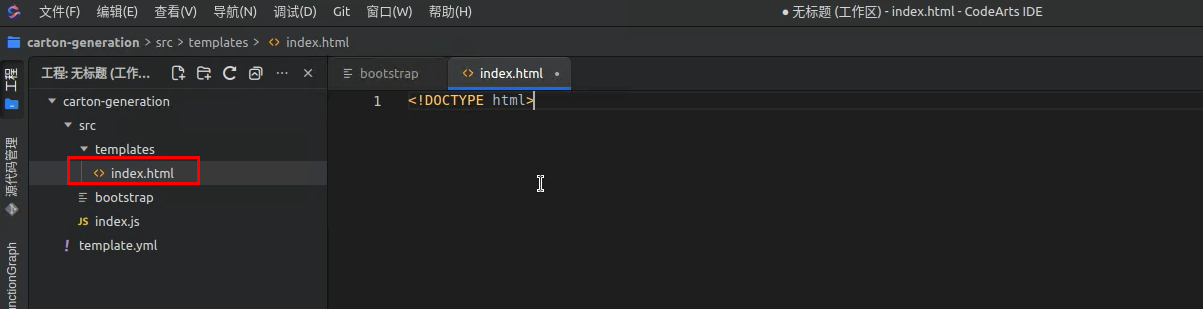
在templates中创建文件index.html。
修改index.html代码如下:
<!DOCTYPE html>
<html lang="en">
<head>
    <meta http-equiv="Content-Type" content="text/html; charset=UTF-8">

    <meta name="viewport" content="width=device-width, initial-scale=1.0">
    <title>FunctionGraph 动漫头像制作</title>
    <style>
        body {
            font-family: Arial, sans-serif;
            background: repeating-linear-gradient(45deg, #ddd 0 2px, transparent 2px 4px), repeating-linear-gradient(-45deg, #ddd 0 2px, transparent 2px 4px);
            text-align: center;
        }

        h1 {
            color: #333;
        }

        p.description {
            color: #666;
        }

        #upload-button {
            padding: 15px 30px;
            background-color: #007bff;
            color: white;
            border: none;
            border-radius: 5px;
            cursor: pointer;
            font-size: 20px;
            margin-top: 20px;
        }
        .image-container {
            display: flex;
            margin-top: 50px;
            justify-content: center;
            align-items: center;
        }

        .image-box {
            margin: 0 40px;
            padding: 0;
            width: 500px;
            height: 500px;
            display: flex;
            flex-direction: row;
            position: relative;
            letter-spacing: .3px;
            padding: 10px;
            border-radius: 10px;
            transition: background-color .3s ease-in-out;
            display: flex;
            justify-content: center;
            align-items: center;
            background-color: white;
            box-shadow: 0 0 10px rgba(0, 0, 0, 0.3);
        }

        #original-image-box, #preview-container {
            border: 2px dashed #6dcff6;
            border-radius: 10px;
            width: 480px;
            height: 480px;
        }

        .but-box {
            margin: 0px 30px;
            padding: 0;
            width: 500px;
            display: flex;
            justify-content: center;
            font-size: 30px;
            font-weight: 700;
        }

        .image-box img {
            height: 100%;
            max-width: 100%;
        }

        .error-message {
            color: red;
            margin-top: 10px;
        }

        .size-warning {
            font-size: 20px;
            color: orange;
            margin-top: 10px;
        }

        button {
            padding: 20px 40px;
            background-color: #4CAF50;
            color: white;
            border: none;
            border-radius: 5px;
            cursor: pointer;
            font-size: 20px;
        }

        h1 {
            font-size: 40px;
        }

        .triangle-arrow {
            width: 0;
            height: 0;
            border-top: 20px solid transparent;
            border-bottom: 20px solid transparent;
            border-left: 30px solid blue;
        }

        .loading-mask {
            position: fixed;
            top: 0;
            left: 0;
            width: 100%;
            height: 100%;
            background-color: rgba(0, 0, 0, 0.1);
            display: none;
            justify-content: center;
            align-items: flex-end;
            z-index: 999;
        }

        .loading-text {

            font-size: 30px;
            color: red;
        }
    </style>
</head>

<body>

<h1>动漫风格头像制作案例:用户上传自拍照片,调用华为云上算力,一键生成动漫风格人物头像。</h1>
<input type="file" id="image-input" style="display: none;">
<button id="upload-button">请上传照片</button>
<p class="size-warning">上传小于 6MB 的图片。</p>
<p class="error-message" id="size-error"></p>

<div class="image-container">
    <div class="image-box">
        <div id="original-image-box">

        </div>
    </div>
    <div class="triangle-arrow"></div>
    <div class="image-box">
        <div id="preview-container">

        </div>
    </div>
</div>

<div class="image-container">
    <div class="but-box">
        原图
    </div>
    <div class="but-box">
        效果图
    </div>
</div>
<div class="loading-mask" id="loading-mask">
    <p class="loading-text">照片生成中...</p>
</div>
<script>
    const uploadButton = document.getElementById('upload-button');
    const imageInput = document.getElementById('image-input');
    const originalImageBox = document.getElementById('original-image-box');
    const imagePreview = document.getElementById("preview-container");
    const sizeError = document.getElementById('size-error');
    const sizeWarning = document.querySelector('.size-warning');
    const loadingMask = document.getElementById('loading-mask');
    uploadButton.addEventListener('click', () => {
        imageInput.click();
    });
    imageInput.addEventListener('change', () => {
        const file = imageInput.files[0];
        if (file) {
            if (file.size > 6 * 1024 * 1024) {
                sizeError.textContent = '图片大小不能超过 6MB。';
                sizeWarning.textContent = '';
                return;
            }

            const img = document.createElement('img');
            img.src = URL.createObjectURL(file);
            originalImageBox.innerHTML = '';
            originalImageBox.appendChild(img);
            if (!file) {
                console.log("!file ")
                return;
            }
            const formData = new FormData();
            formData.append("image", file);
            loadingMask.style.display = 'flex';
            fetch("/carton/upload", {
                method: "POST",
                body: formData,
            })
                .then((response) => response.text())
                .then((data) => {
					let parsedObject;
                    try {
                        parsedObject = JSON.parse(data);
                    } catch (error) {
                        console.error('JSON 解析错误:', error);
                        parsedObject = null; // 或者其他默认值,根据你的需求设置
                    }

                    const animeImgElement = document.createElement('img');
                    animeImgElement.src = "data:image/png;base64," +
                        parsedObject.results[0];
                    imagePreview.innerHTML = '';
                    imagePreview.appendChild(animeImgElement);
                    loadingMask.style.display = 'none';
                })
                .catch((error) => {
                    loadingMask.style.display = 'none';
                    console.error(error);
                    alert("处理失败");
                });
        }
    });

</script>

</body>
</html>
修改app.py内容如下:(复制文档中python代码时,可能会导致格式错误,可以从下载的项目资料中获取app.py文件内容!)
from flask import Flask, request, render_template
import requests
import os

MODEL_ART_API = os.getenv('MODEL_ART_API')

app = Flask(__name__)

@app.route('/')
def index():
    return render_template('index.html')

@app.route('/carton/upload', methods=['POST'])
def upload_file():
    if 'image' not in request.files:
        return 'No file uploaded.', 400

    file = request.files['image']
    if file.filename == '':
        return 'Filename is empty.', 400

    resp = model_art_pic_carton(file)

    print(resp)
    return resp.json()

def model_art_pic_carton(file):
    payload = {}
    files=[  ('images',(file.filename,file,'image/png'))]
    headers = {
    'x-auth-token': get_token_from_fg_header()
    }
    response = requests.request("POST", MODEL_ART_API, headers=headers, data=payload, files=files,verify=False)
    return response

# 从FunctionGraph平台发送的请求里获取鉴权token
# 需要先配置委托 并且 在高级设置打开传入秘钥开关
def get_token_from_fg_header():
    return request.headers.get("X-Cff-Auth-Token")

if __name__ == '__main__':
    app.run(debug=True,port=8000,host="0.0.0.0")
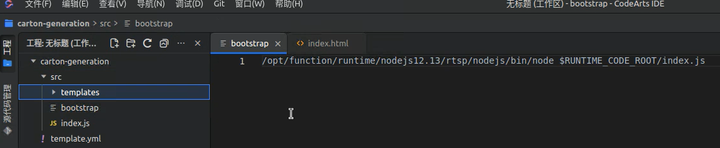
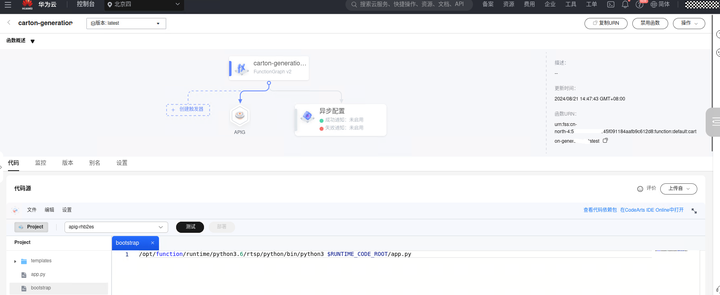
修改bootstrap文件内容如下:
/opt/function/runtime/python3.6/rtsp/python/bin/python3 $RUNTIME_CODE_ROOT/app.py
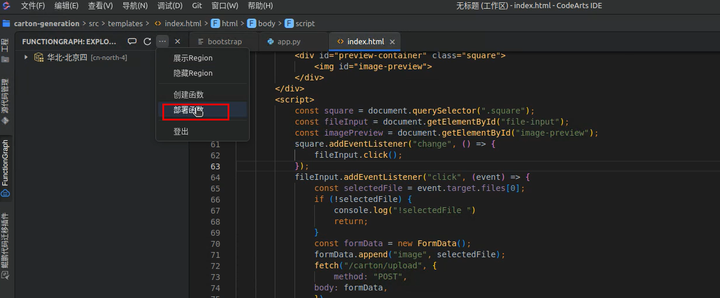
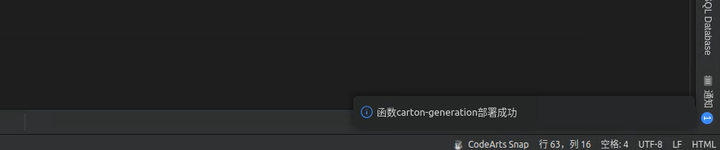
六、部署函数
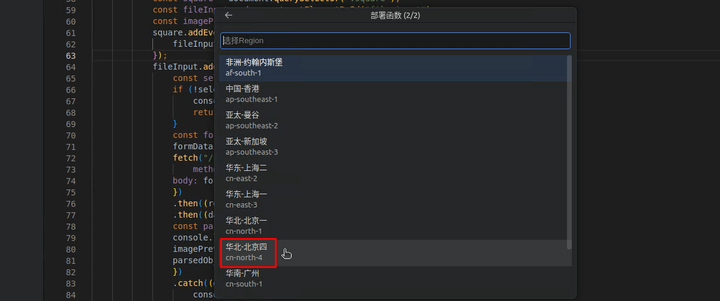
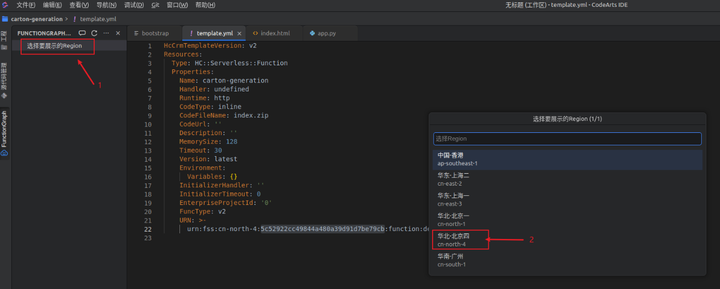
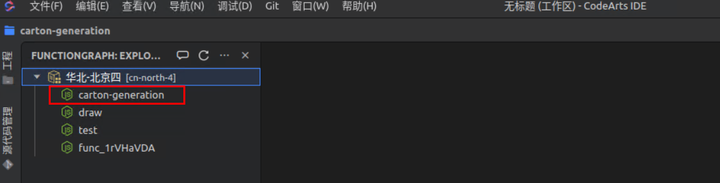
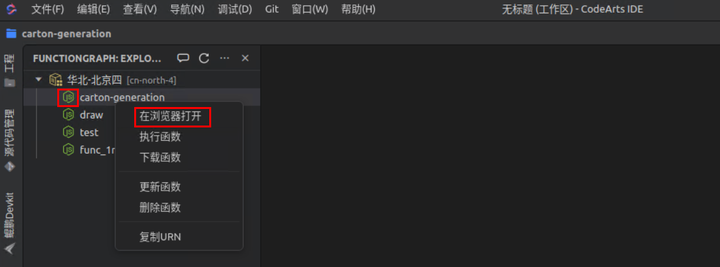
点击“选择要展示的Region”,选择“华北-北京四”,可以看到该区域下刚部署好的函数:
右键选择函数,点击浏览器打开,跳转到函数详情界面。
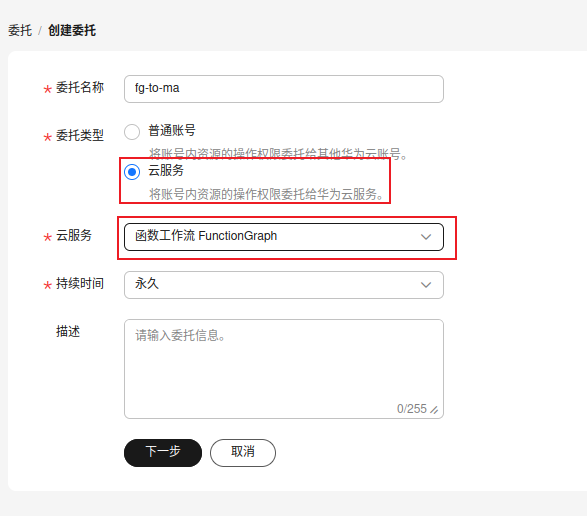
七、函数配置委托
输入委托名称、委托类型选择“云服务”、云服务选择“函数工作流FunctionGraph”。
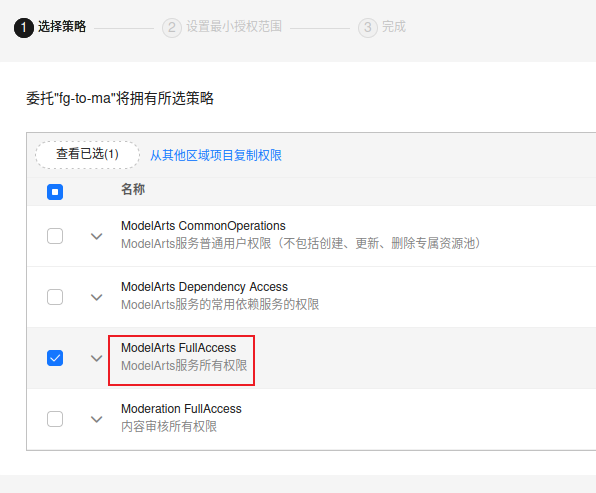
配置权限,选择ModelArts FullAccess。
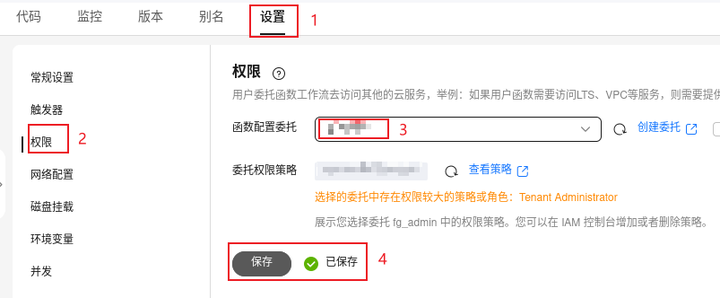
回到浏览器函数详情界面,点击“设置”,选择“权限”,“函数配置委托”选择提前创建好的委托,点击“保存”。
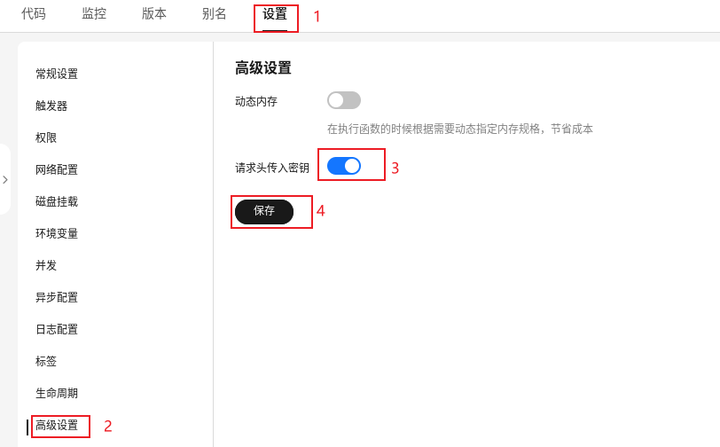
配置高级设置,点击“设置”,选择“高级设置”,启用“请求头传入秘钥”,点击“保存”。
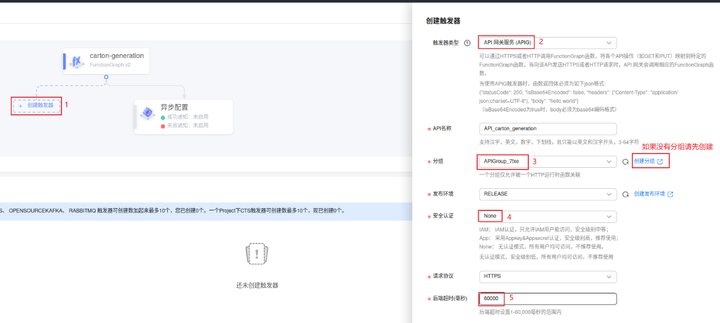
八、函数配置触发器
点击“创建触发器”,选择“触发器类型”,选择“分组”(如果没有分组需先创建),选择“安全认证”,设置“后端超时”。
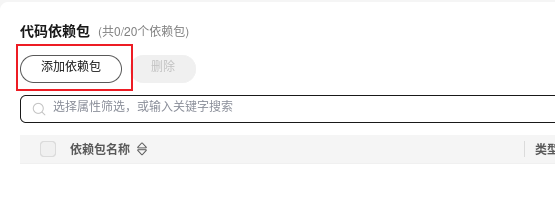
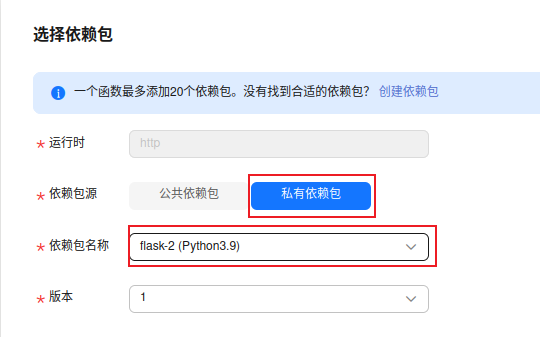
九、函数添加依赖包
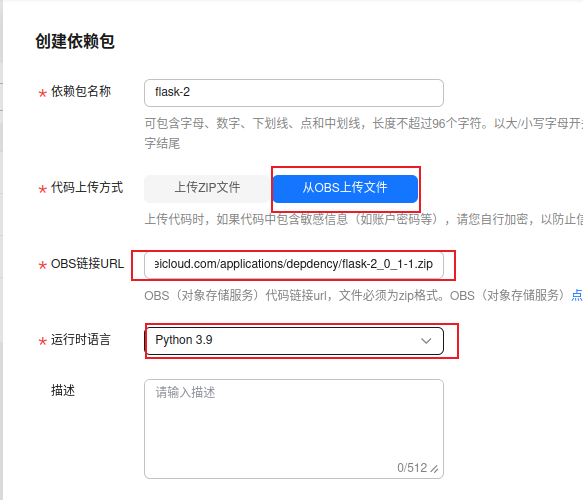
返回“函数工作流”管理界面,选择“依赖包管理”,点击“创建依赖包”。
填写“依赖包名称”,代码包上传方式为“从OBS上传文件”,将OBS链接粘贴到“OBS链接URL”中(OBS URL:https://functionstorage-cn-north-4.obs.cn-north-4.myhuaweicloud.com/applications/depdency/flask-2_0_1-1.zip )
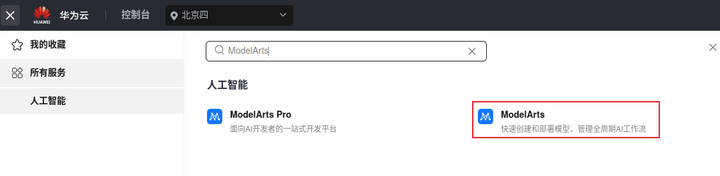
十、订阅模型并部署AI应用
在华为云控制台点击搜索框搜索“ ModelArts ”,点击“ModelArts”,选择“AI Gallery”。
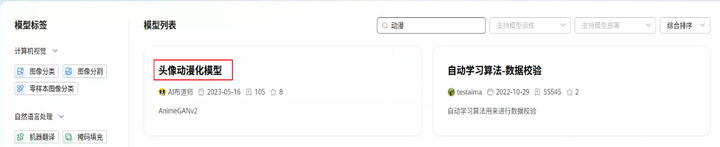
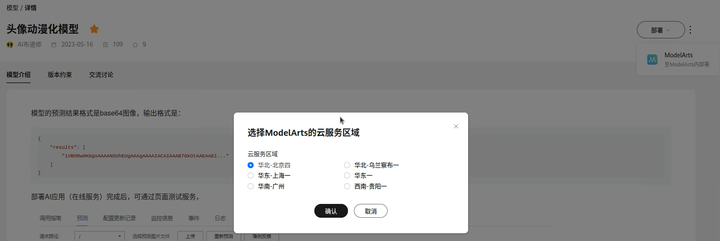
导航栏选择“模型”,搜索框输入“动漫”,选择“头像动漫化模型”。
进入详情页,点击“部署”,选择“ModelArts”。
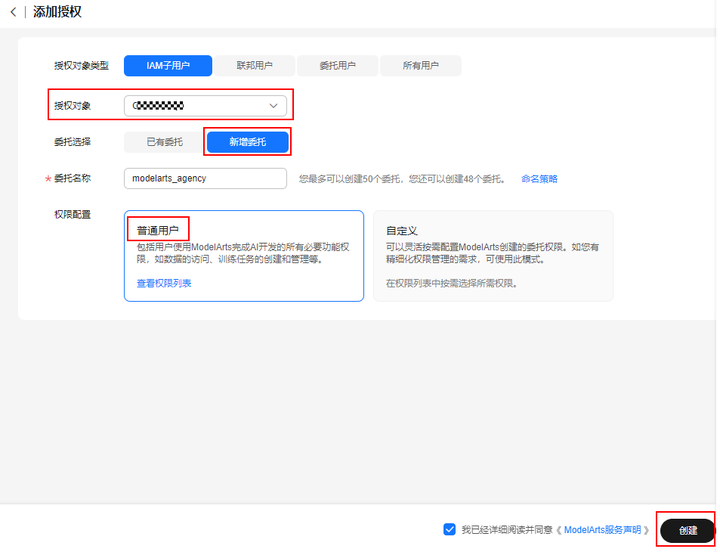
跳转到订阅应用列表,如果页面提示需要创建委托,根据指引创建即可。
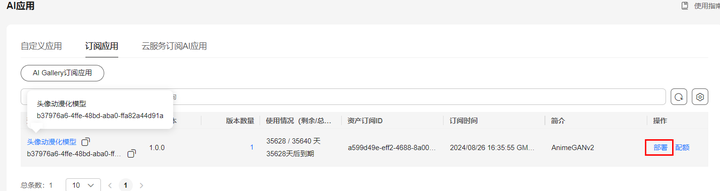
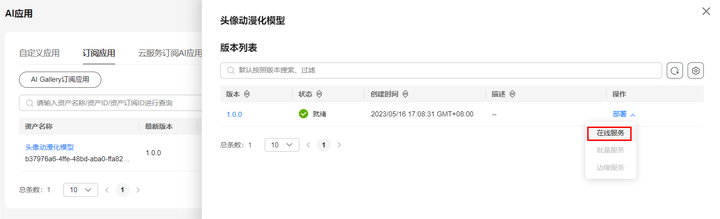
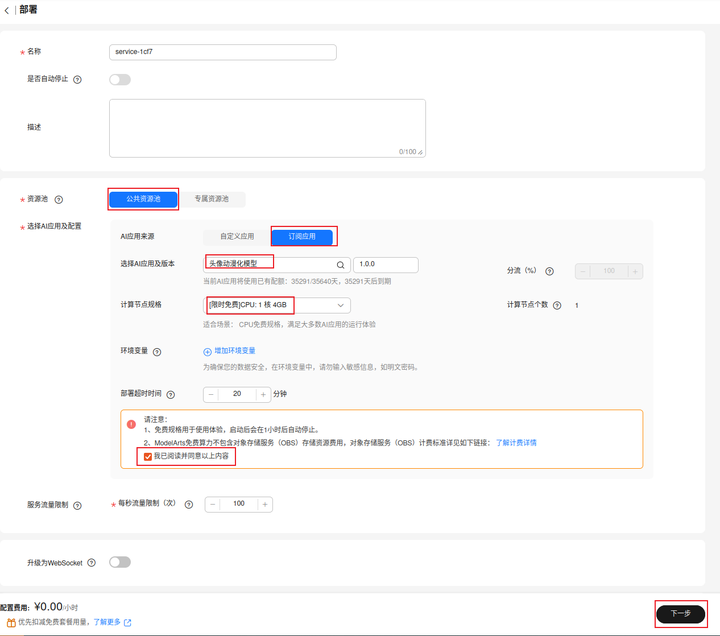
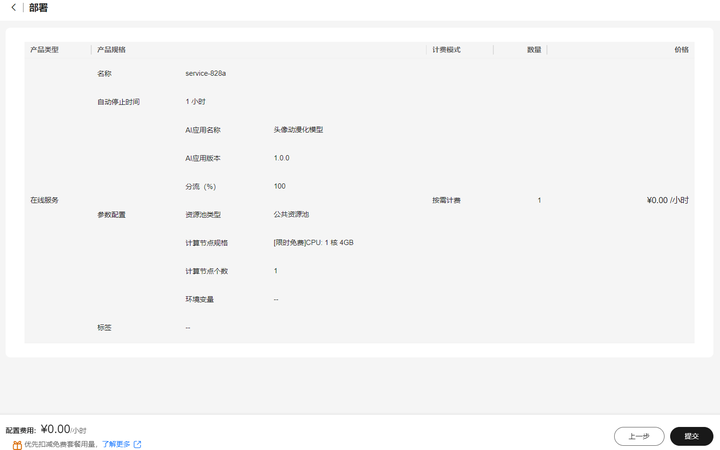
资源池选择“公共资源池”,AI应用及配置选择“订阅应用”,选择AI应用及版本,计算节点规格选择“[限时免费]CPU:1核4GB”,勾选“我已阅读并同意以上内容”,点击“下一步”。
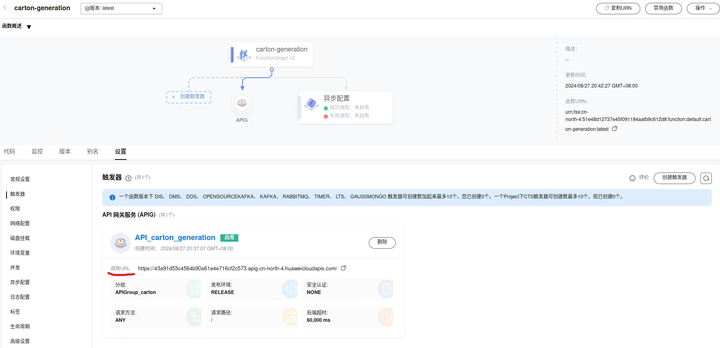
确认服务处于运行中状态,复制API接口公网地址备用。
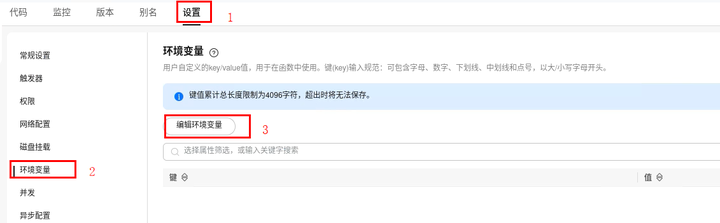
回到函数页面,设置环境变量,键:MODEL_ART_API,值:刚刚复制的API接口公网地址。
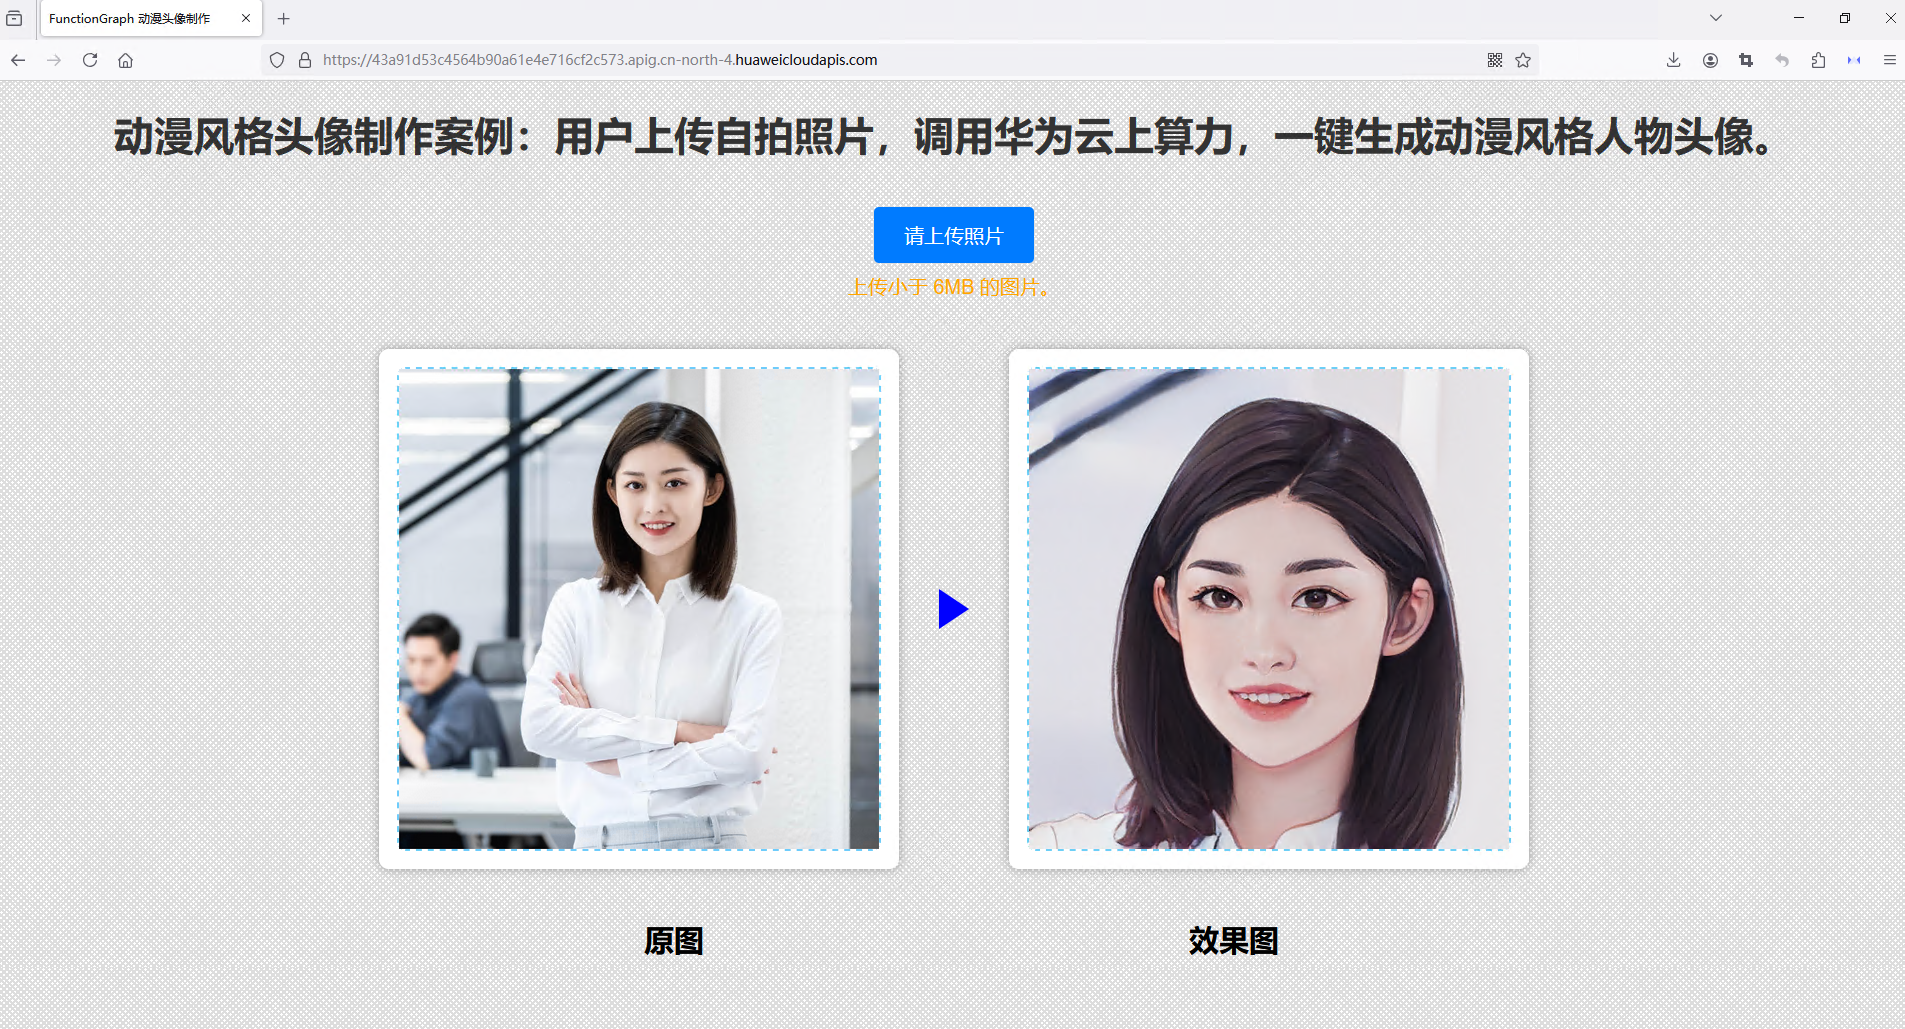
十一、制作动漫头像
到这里函数和AI应用就已经部署好了,可以复制URL到浏览器打开web页面开始制作动漫头像。