1.背景
当下来看,插件化开发模式思想正在很多编程语言或技术框架中广泛应用实践,比如大家日常编码使用的编辑器idea,vscode一大亮点就是支持各种插件安装,随处可见的带有热插拔功能的插件,让系统像插了翅膀一样,大大提升了系统的扩展性和伸缩性,使系统功能更加丰富强大,下面就来说说插件开发模式带来的好处:
实现服务模块之间解耦的方式有很多,但是插件来说,其解耦的程度似乎更高,而且更灵活,可定制化、个性化更好。以spring来说,之所以具备如此广泛的生态,与其自身内置的各种可扩展的插件机制是分不开的,试想为什么使用了spring框架之后可以很方便的对接其他中间件,那就是spring框架提供了很多基于插件化的扩展点,不清楚的可以看看之前我们总结的 Spring扩展点之一:后置处理器postProcessor
插件化机制让系统的扩展性得以提升,从而可以丰富系统的周边应用生态。这也是当下idea,vscode能成为热门工具一大原因之一
有了插件之后,第三方框架或系统如果要对接自身的系统框架,直接基于系统框架预留的插件接口和约定规范完成一套适合自己业务的编码实现即可,这样与自身系统框架的不会有任何耦合度,甚至可以实现基于配置参数的热加载,方便灵活,开箱即用。Spring Boot众多其他框架(如mybatis,redis)的starter就是这种思想实现的,具体可以看看 Spring Boot自动配置原理详解和自定义封装实现starter一文。
2.JAVA SPI
2.1 什么是SPI
SPI全称Service Provider Interface,是Java提供的一套用来被第三方实现或者扩展的接口,它可以用来启用框架扩展和替换组件。 SPI的作用就是为这些被扩展的API寻找服务实现。本质是将接口实现类的全限定名配置在文件中,并由服务加载器读取配置文件,加载实现类。这样可以在运行时,动态为接口替换实现类。通过在ClassPath路径下的META-INF/services文件夹查找文件,自动加载文件里所定义的类,进而实现可插拔,解耦。
2.2 使用案例
首先我们定义一个接口:
/**
 * @author fjzheng
 * @version 1.0
 * @date 2021/11/5 10:32
 */
public interface SpiService {
    void execute();
}
然后再定义两个接口实现类,这里为了方便就写在一个项目中,但是SPI的核心思想是引入相关框架之后,通过框架提供的spi机制,可以在自己的项目中提供spi接口实现类,动态扩展框架功能和做到可插拔,例如jdbc。
/**
 * @author fjzheng
 * @version 1.0
 * @date 2021/11/5 10:34
 */
public class SpiServiceImpl1 implements SpiService {
    @Override
    public void execute() {
        System.out.println("SpiServiceImpl1 execute finish.....");
    }
}


public class SpiServiceImpl2 implements SpiService {
    @Override
    public void execute() {
        System.out.println("piServiceImpl2 execute finish.....");
    }
}
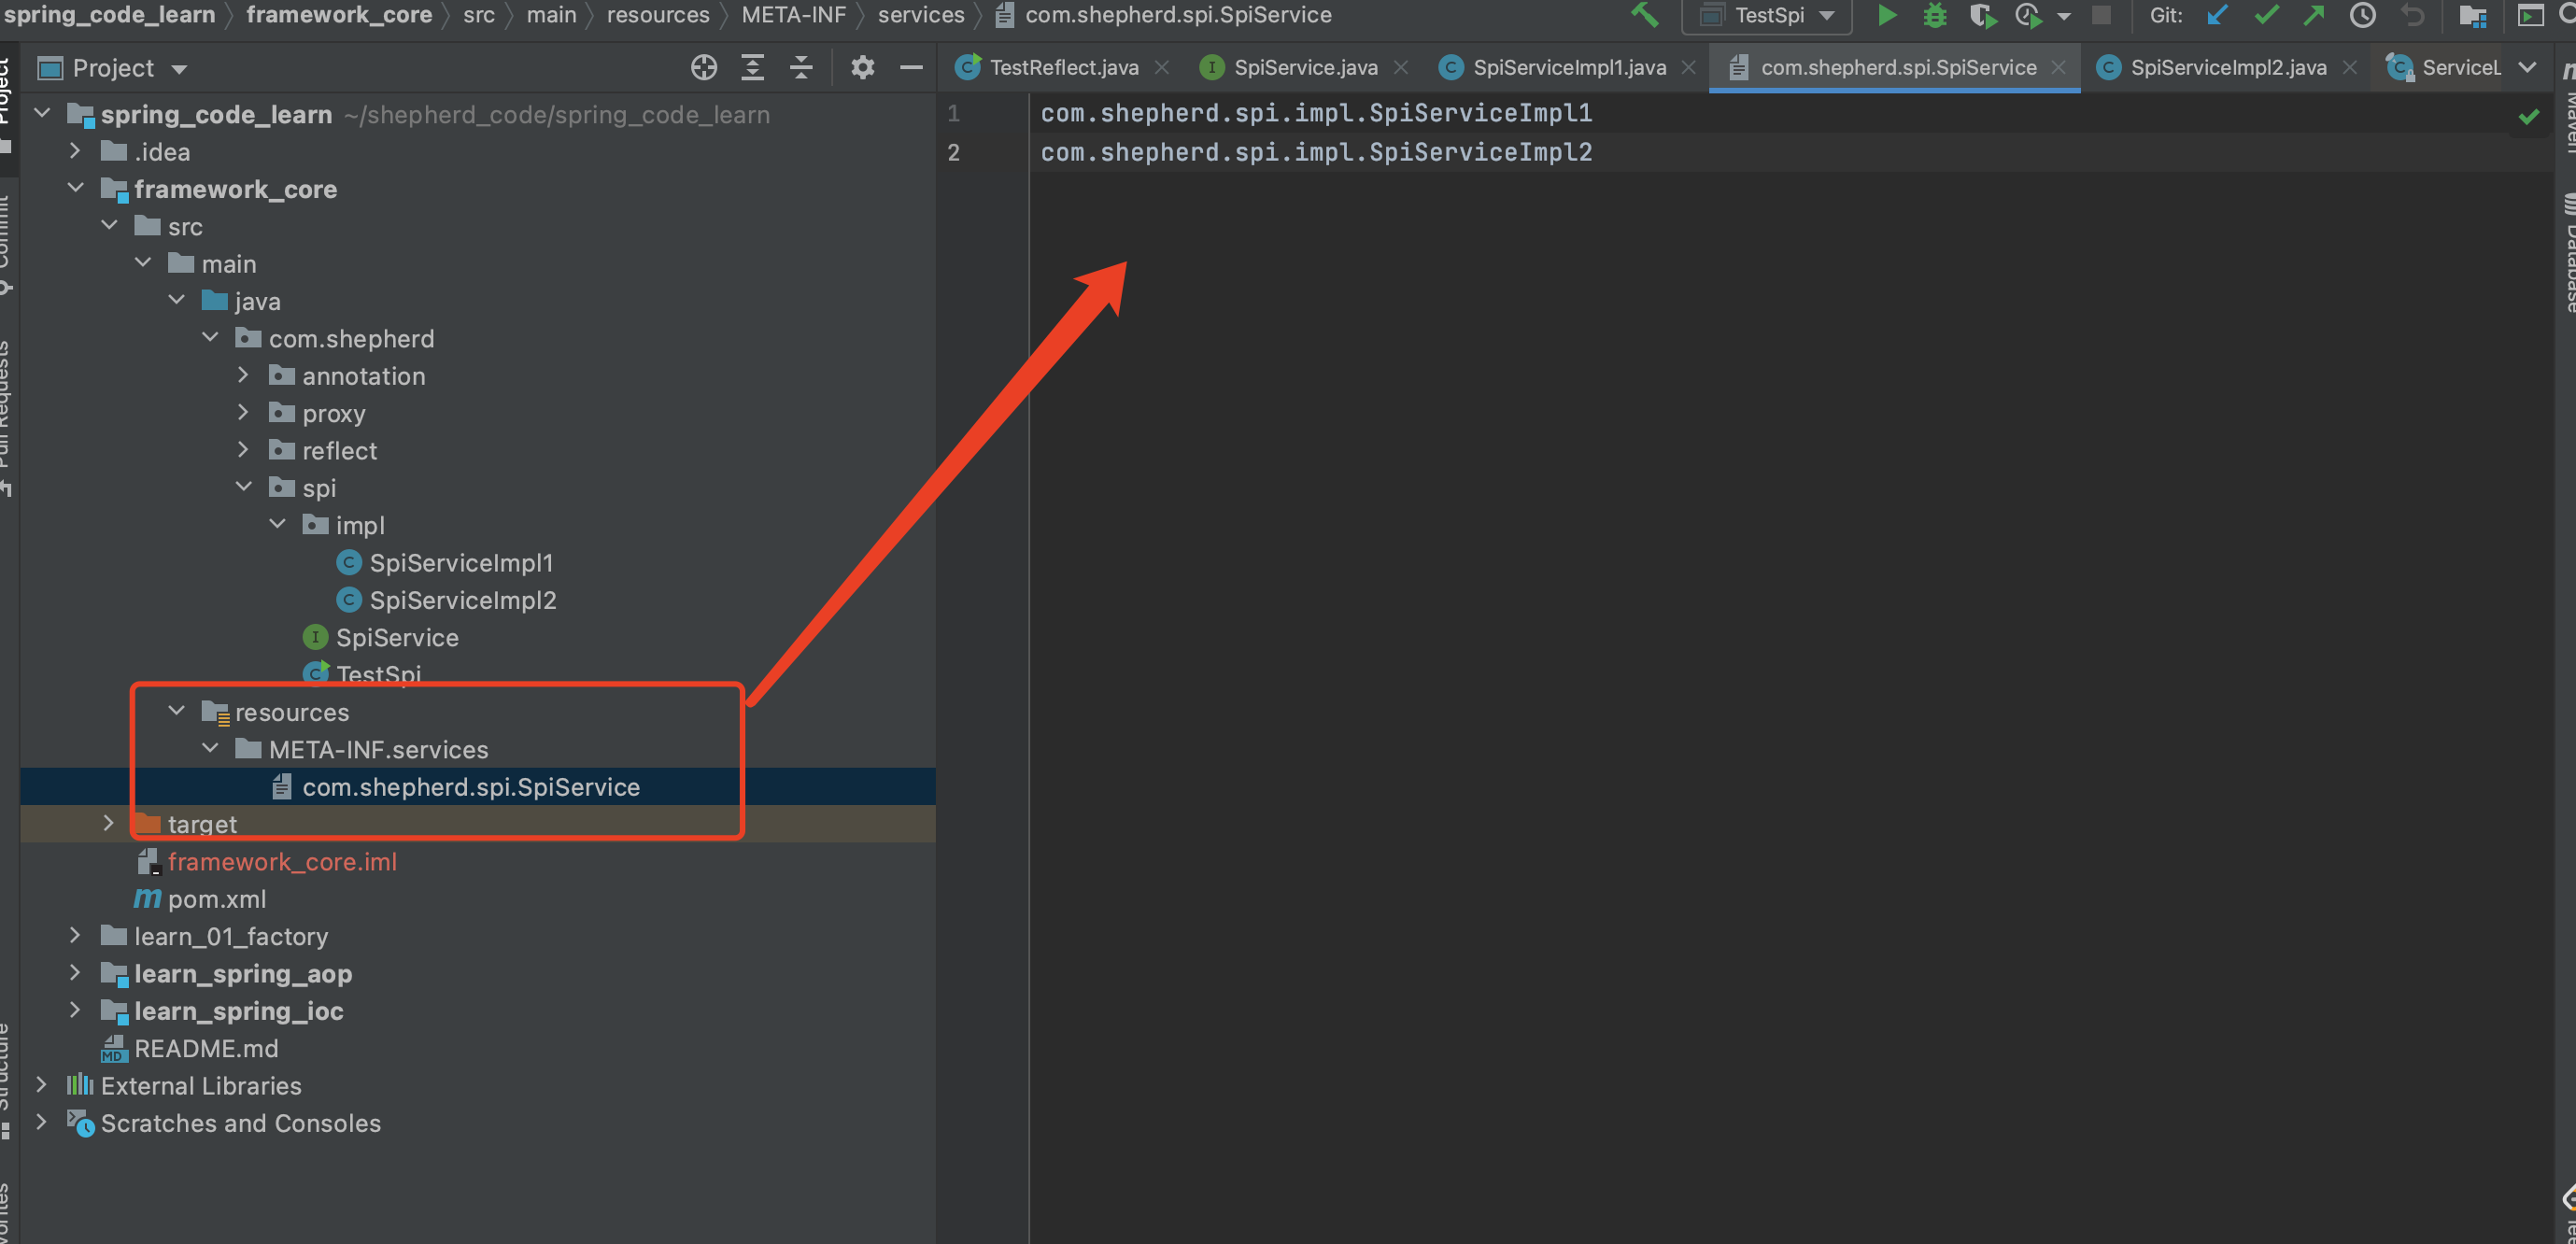
接下来我们要在项目的ClassPath即resources下创建META-INF/services目录,然后在该目录下创建一个文件,文件名为接口的全限定类名,文件里写入接口实现类的全限定类名,如下所示:
![]()
最后我们就可以通过ServiceLoader.load或者Service.providers方法拿到实现类的实例。其中,Service.providers包位于sun.misc.Service,而ServiceLoader.load包位于java.util.ServiceLoader
/**
 * @author fjzheng
 * @version 1.0
 * @date 2021/11/5 10:42
 */
public class TestSpi {
    public static void main(String[] args) {
        Iterator<SpiService> providers = Service.providers(SpiService.class);
        ServiceLoader<SpiService> load = ServiceLoader.load(SpiService.class);

        while(providers.hasNext()) {
            SpiService ser = providers.next();
            ser.execute();
        }
        System.out.println("--------------------------------");
        Iterator<SpiService> iterator = load.iterator();
        while(iterator.hasNext()) {
            SpiService ser = iterator.next();
            ser.execute();
        }
    }
}
运行接口如下所示:
SpiServiceImpl1 execute finish.....
SpiServiceImpl2 execute finish.....
--------------------------------
SpiServiceImpl1 execute finish.....
SpiServiceImpl2 execute finish.....
demo代码:https://github.com/ShepherdZFJ/spring_code_learn/tree/main/framework_core/src/main/java/com/shepherd/spi
2.3 浅析Java SPI源码实现
我们看到一个位于sun.misc包,一个位于java.util包,sun包下的源码看不到。我们就以ServiceLoader.load为例,通过源码看看它里面到底怎么做的。
ServiceLoader
首先看看ServiceLoader类结果变量信息:
public final class ServiceLoader<S> implements Iterable<S>
    //配置文件的路径
    private static final String PREFIX = "META-INF/services/";
    //加载的服务类或接口
    private final Class<S> service;
    //已加载的服务类集合
    private LinkedHashMap<String,S> providers = new LinkedHashMap<>();
    //类加载器
    private final ClassLoader loader;
    //内部类,真正加载服务类
    private LazyIterator lookupIterator;

		......
}
ServiceLoader的load()方法创建了一些属性,重要的是实例化了内部类LazyIterator。最后返回ServiceLoader的实例
    private ServiceLoader(Class<S> svc, ClassLoader cl) {
        service = Objects.requireNonNull(svc, "Service interface cannot be null");
        loader = (cl == null) ? ClassLoader.getSystemClassLoader() : cl;
        acc = (System.getSecurityManager() != null) ? AccessController.getContext() : null;
        reload();
    }

    public void reload() {
        providers.clear();
        lookupIterator = new LazyIterator(service, loader);
    }
load()最终执行上面的构造方法,并对相关属性赋值,返回ServiceLoader的实例。
查找实现类
查找实现类和创建实现类的过程,都在LazyIterator完成。当我们调用iterator.hasNext和iterator.next方法的时候,实际上调用的都是LazyIterator的相应方法。
public Iterator<S> iterator() {
    return new Iterator<S>() {
        public boolean hasNext() {
            return lookupIterator.hasNext();
        }
        public S next() {
            return lookupIterator.next();
        }
        .......
    };
}
所以,我们重点关注lookupIterator.hasNext()方法,它最终会调用到hasNextService。
private class LazyIterator implements Iterator<S>{
    Class<S> service;
    ClassLoader loader;
    Enumeration<URL> configs = null;
    Iterator<String> pending = null;
    String nextName = null;
    private boolean hasNextService() {
        //第二次调用的时候,已经解析完成了,直接返回
        if (nextName != null) {
            return true;
        }
        if (configs == null) {
            //META-INF/services/ 加上接口的全限定类名,就是文件服务类的文件
            //META-INF/services/com.viewscenes.netsupervisor.spi.SPIService
            String fullName = PREFIX + service.getName();
            //将文件路径转成URL对象
            configs = loader.getResources(fullName);
        }
        while ((pending == null) || !pending.hasNext()) {
            //解析URL文件对象,读取内容,最后返回
            pending = parse(service, configs.nextElement());
        }
        //拿到第一个实现类的类名
        nextName = pending.next();
        return true;
    }
}
创建实例对象
调用next方法的时候,实际调用到的是,lookupIterator.nextService。它通过反射的方式,创建实现类的实例并返回
private class LazyIterator implements Iterator<S>{
    private S nextService() {
        //全限定类名
        String cn = nextName;
        nextName = null;
        //创建类的Class对象
        Class<?> c = Class.forName(cn, false, loader);
        //通过newInstance实例化
        S p = service.cast(c.newInstance());
        //放入集合,返回实例
        providers.put(cn, p);
        return p;
    }
}
流程图如下:
![]()
以上是ServiceLoader实现spi机制的核心流程源码讲解。
项目推荐:基于SpringBoot2.x、SpringCloud和SpringCloudAlibaba企业级系统架构底层框架封装,解决业务开发时常见的非功能性需求,防止重复造轮子,方便业务快速开发和企业技术栈框架统一管理。引入组件化的思想实现高内聚低耦合并且高度可配置化,做到可插拔。严格控制包依赖和统一版本管理,做到最少化依赖。注重代码规范和注释,非常适合个人学习和企业使用
Github地址:https://github.com/plasticene/plasticene-boot-starter-parent
Gitee地址:https://gitee.com/plasticene3/plasticene-boot-starter-parent
微信公众号:Shepherd进阶笔记
交流探讨qun:Shepherd_126
3.SPI机制思想框架应用
3.1 common-logging
apache最早提供的日志的门面接口。只有接口,没有实现。具体方案由各提供商实现, 发现日志提供商是通过扫描 META-INF/services/org.apache.commons.logging.LogFactory配置文件,通过读取该文件的内容找到日志提供的实现类。
只要我们的日志实现里包含了这个文件,并在文件里制定 LogFactory工厂接口的实现类即可。
3.2 JDBC
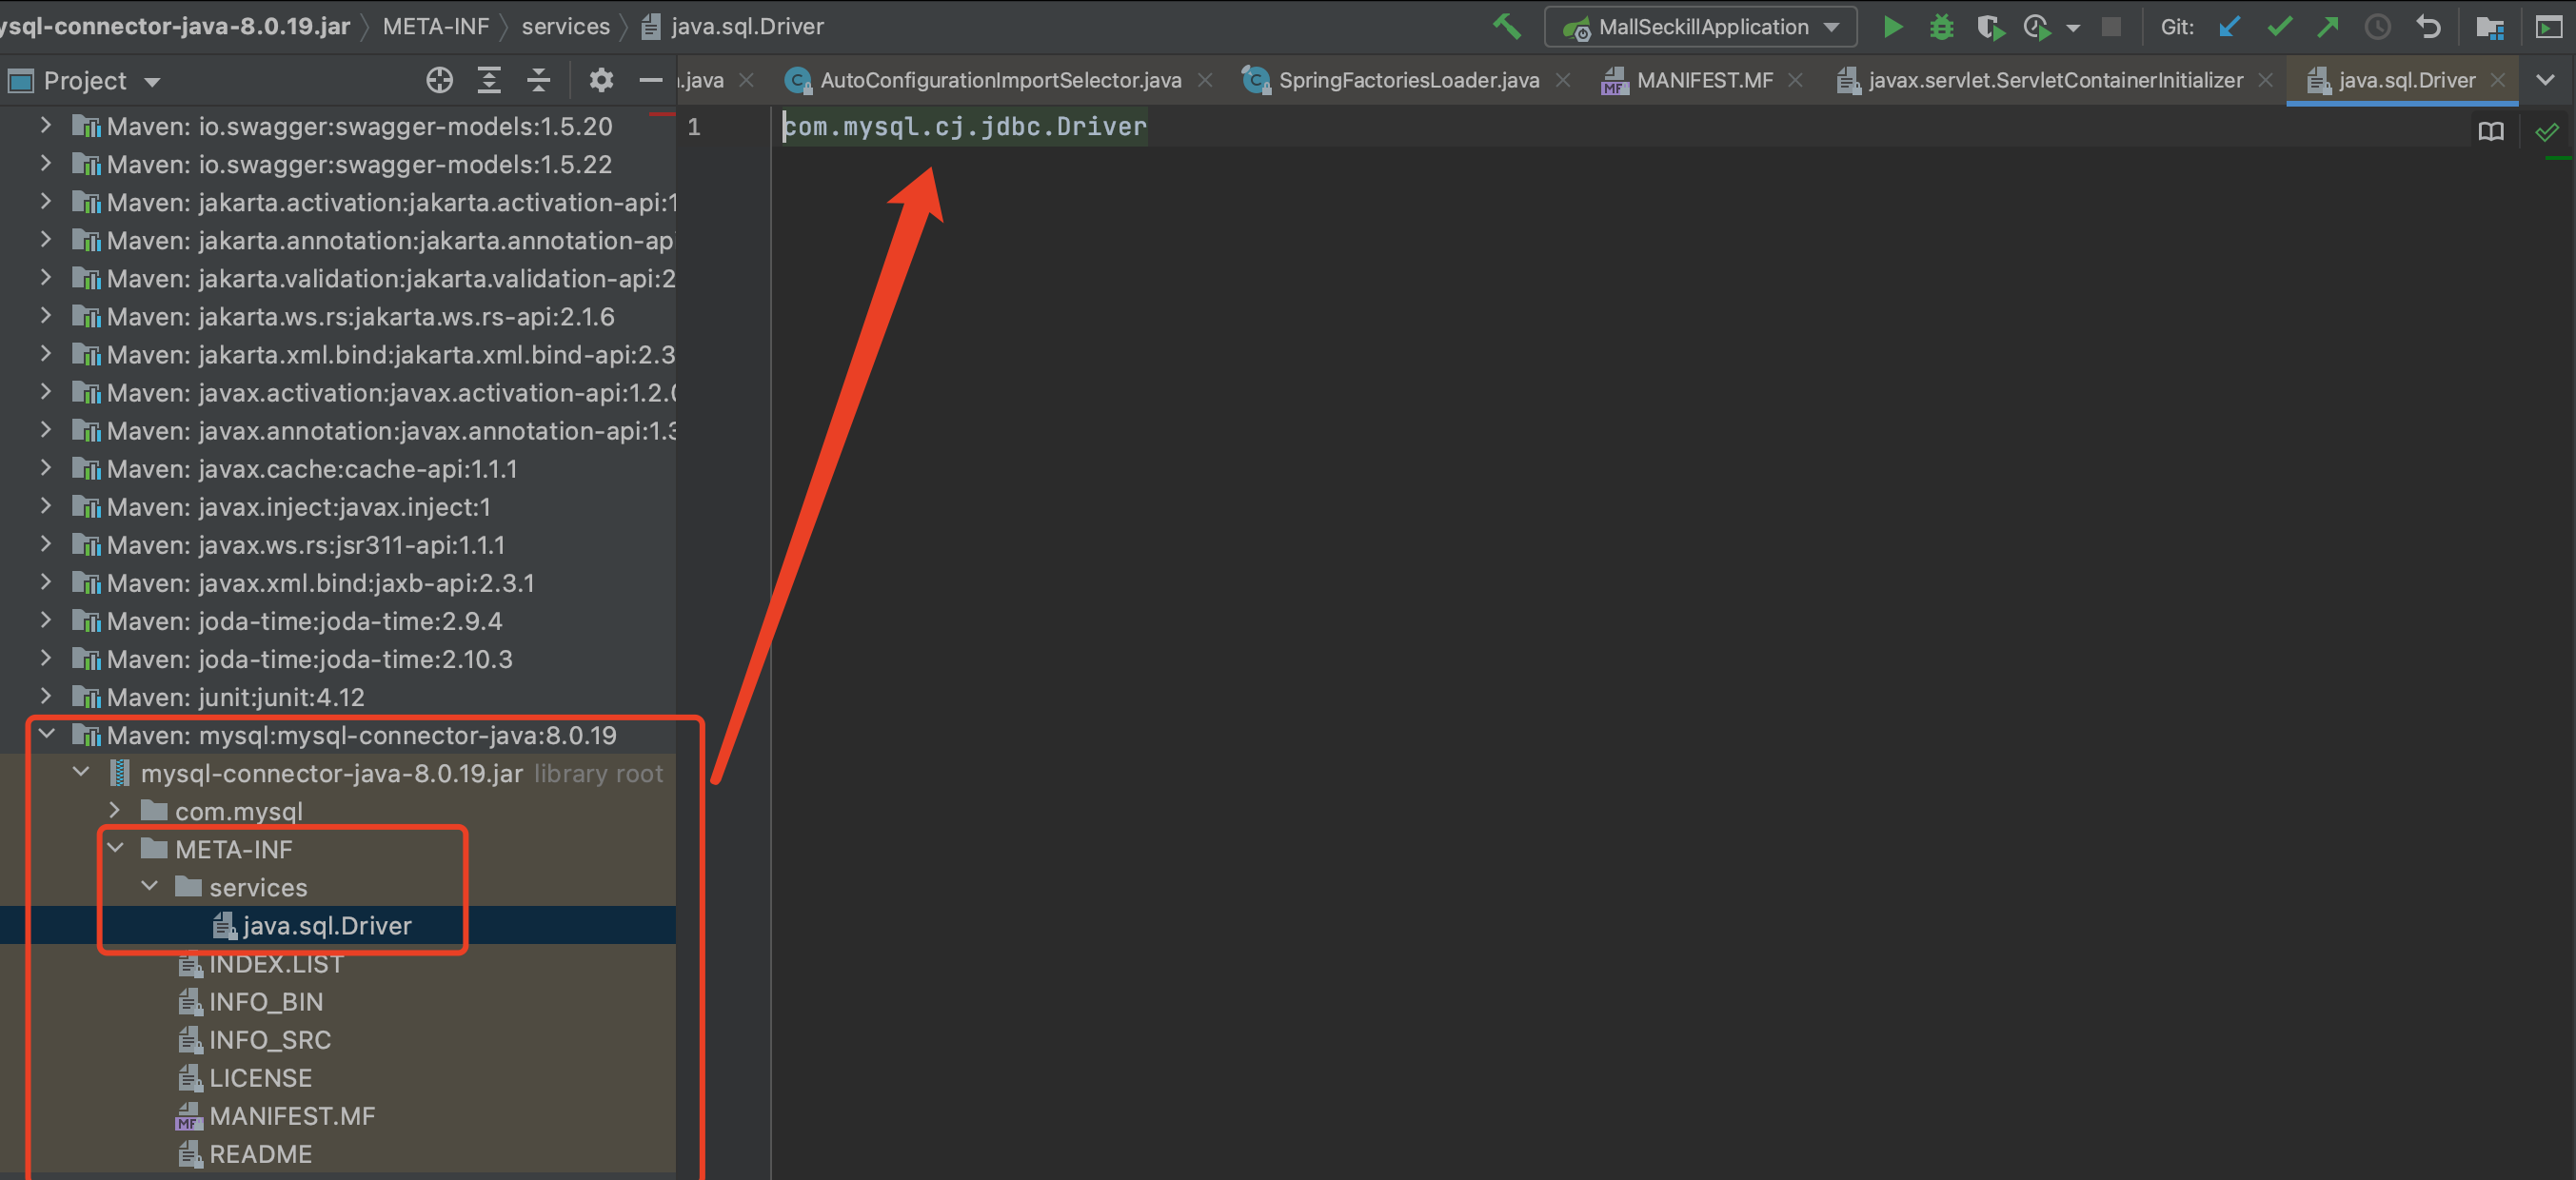
jdbc4.0以前, 开发人员还需要基于Class.forName("xxx")的方式来装载驱动,jdbc4以后基于spi的机制来发现驱动提供商了,可以通过META-INF/services/java.sql.Driver文件里指定实现类的方式来暴露驱动提供者。如下所示:
![]()
3.3 Spring Boot中SPI机制
springboot最重要的特性就是自动配置,许多功能不需要手动开启,会自动帮助程序员开启,如果想扩展某些第三方组件的功能,例如mybatis,只需要配置依赖,就可以了,这其中都是需要SPI支持实现的,下面我们从源码层面看看springboot如何通过spi机制实现自动配置的。
从项目启动类的run方法进入:
public class SpringApplication {


	/**
	 * Create a new {@link SpringApplication} instance. The application context will load
	 * beans from the specified primary sources (see {@link SpringApplication class-level}
	 * documentation for details. The instance can be customized before calling
	 * {@link #run(String...)}.
	 * @param resourceLoader the resource loader to use
	 * @param primarySources the primary bean sources
	 * @see #run(Class, String[])
	 * @see #setSources(Set)
	 */
	@SuppressWarnings({ "unchecked", "rawtypes" })
	public SpringApplication(ResourceLoader resourceLoader, Class<?>... primarySources) {
		this.resourceLoader = resourceLoader;
		Assert.notNull(primarySources, "PrimarySources must not be null");
		this.primarySources = new LinkedHashSet<>(Arrays.asList(primarySources));
		this.webApplicationType = WebApplicationType.deduceFromClasspath();
		setInitializers((Collection) getSpringFactoriesInstances(ApplicationContextInitializer.class));
		setListeners((Collection) getSpringFactoriesInstances(ApplicationListener.class));
		this.mainApplicationClass = deduceMainApplicationClass();
	}

  	private <T> Collection<T> getSpringFactoriesInstances(Class<T> type) {
		return getSpringFactoriesInstances(type, new Class<?>[] {});
	}

	private <T> Collection<T> getSpringFactoriesInstances(Class<T> type, Class<?>[] parameterTypes, Object...    args) {
		ClassLoader classLoader = getClassLoader();
		// Use names and ensure unique to protect against duplicates
		Set<String> names = new LinkedHashSet<>(SpringFactoriesLoader.loadFactoryNames(type, classLoader));
		List<T> instances = createSpringFactoriesInstances(type, parameterTypes, classLoader, args, names);
		AnnotationAwareOrderComparator.sort(instances);
		return instances;
	}

  ........
}
进入的getSpringFactoriesInstances()方法,就会看到一个关键的类SpringFactoriesLoader,这个类就是springboot的spi机制实现的核心类,相当于JDK中spi机制的ServiceLoader
Spring-Core包的core/io/support下定义了SpringFactoriesLoader类,这个类用来加载META-INF/spring.factories文件,并获取指定接口的实现类。
loadFactories:使用给定的类加载器从文件中加载并实例化给定类型的工厂实现。(返回的是实例对象列表)
loadFactoryNames:使用给定的类加载器从文件中加载给定类型的工厂实现的标准类名。(返回的是类名列表)
public final class SpringFactoriesLoader {

	/**
	 * The location to look for factories.
	 * <p>Can be present in multiple JAR files.
	 */
	public static final String FACTORIES_RESOURCE_LOCATION = "META-INF/spring.factories";


	private static final Log logger = LogFactory.getLog(SpringFactoriesLoader.class);

	private static final Map<ClassLoader, MultiValueMap<String, String>> cache = new ConcurrentReferenceHashMap<>();


	private SpringFactoriesLoader() {
	}

  //加载并实例化给定类型的工厂实现
	public static <T> List<T> loadFactories(Class<T> factoryType, @Nullable ClassLoader classLoader) {
    Assert.notNull(factoryType, "'factoryType' must not be null");
    ClassLoader classLoaderToUse = classLoader;
    if (classLoaderToUse == null) {
        classLoaderToUse = SpringFactoriesLoader.class.getClassLoader();
    }
    // 返回的类名列表
    List<String> factoryImplementationNames = loadFactoryNames(factoryType, classLoaderToUse);
    if (logger.isTraceEnabled()) {
        logger.trace("Loaded [" + factoryType.getName() + "] names: " + factoryImplementationNames);
    }
    List<T> result = new ArrayList<>(factoryImplementationNames.size());
    for (String factoryImplementationName : factoryImplementationNames) {
        // 实例化
        result.add(instantiateFactory(factoryImplementationName, factoryType, classLoaderToUse));
    }
    AnnotationAwareOrderComparator.sort(result);
    return result;
	}
  //加载指定类型的工厂实现的标准类名
  public static List<String> loadFactoryNames(Class<?> factoryType, @Nullable ClassLoader classLoader) {
    String factoryTypeName = factoryType.getName();
    return loadSpringFactories(classLoader).getOrDefault(factoryTypeName, Collections.emptyList());
  }
  // 加载spring.factoies文件
  private static Map<String, List<String>> loadSpringFactories(@Nullable ClassLoader classLoader) {
    MultiValueMap<String, String> result = cache.get(classLoader);
    if (result != null) {
        return result;
    }
    try {
        // 获取文件的地址,将当前项目内及其引入的jar包下的META-INF/spring.factories文件全部读取出来
        Enumeration<URL> urls = (classLoader != null ?
                classLoader.getResources(FACTORIES_RESOURCE_LOCATION) :
                ClassLoader.getSystemResources(FACTORIES_RESOURCE_LOCATION));
        result = new LinkedMultiValueMap<>();
        while (urls.hasMoreElements()) {
            URL url = urls.nextElement();
            UrlResource resource = new UrlResource(url);
            // 读取加载
            Properties properties = PropertiesLoaderUtils.loadProperties(resource);
            for (Map.Entry<?, ?> entry : properties.entrySet()) {
                String factoryTypeName = ((String) entry.getKey()).trim();
                for (String factoryImplementationName : StringUtils.commaDelimitedListToStringArray((String) entry.getValue())) {
                    result.add(factoryTypeName, factoryImplementationName.trim());
                }
            }
        }
        cache.put(classLoader, result);
        return result;
    }

	@SuppressWarnings("unchecked")
	private static <T> T instantiateFactory(String factoryImplementationName, Class<T> factoryType, ClassLoader classLoader) {
		try {
			Class<?> factoryImplementationClass = ClassUtils.forName(factoryImplementationName, classLoader);
			if (!factoryType.isAssignableFrom(factoryImplementationClass)) {
				throw new IllegalArgumentException(
						"Class [" + factoryImplementationName + "] is not assignable to factory type [" + factoryType.getName() + "]");
			}
			return (T) ReflectionUtils.accessibleConstructor(factoryImplementationClass).newInstance();
		}
		catch (Throwable ex) {
			throw new IllegalArgumentException(
				"Unable to instantiate factory class [" + factoryImplementationName + "] for factory type [" + factoryType.getName() + "]",
				ex);
		}
	}

}
如mybatis-spring-boot-starter、spring-boot-starter-web等组件的META-INF文件下均含有spring.factories文件,自动配置模块中,SpringFactoriesLoader收集到文件中的类全名并返回一个类全名的数组,返回的类全名通过反射被实例化,就形成了具体的工厂实例,工厂实例来生成组件具体需要的bean,这就是Spring Boot自动配置的核心原理。
4.总结
SPI这种插件开发思想机制在一众系统或框架中大量应用,所以上面深刻总结该机制原理和使用、以及在框架中的使用案例,加深对其理解在架构设计方面都有着很重要的意义。值得细细品读!!!